January 23, 2011

Pink cupcakes…

by ministamper

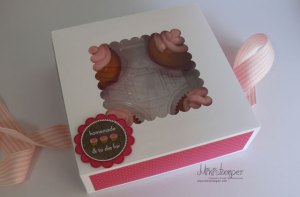
I found a cupcake insert for my cupcake boxes to stop them from rolling around inside the box, it’s great but I had to change the width of the box to accomodate the insert, and the negative side of that is I lost some height in my box so I can’t put really high cupcakes into it, so, what I will do from now on is, if I make muffins I will use the original size box, and if I make iced cupcakes I will make the new size box. Here are a few pictures.


I used Stampin’ Up! Whisper White 12X12 cardstock, and decorated it with Melon Mambo DSP with a touch of Pretty In Pink Striped Grosgrain Ribbon, I took this to my Stampin’ Up! card swap yesterday and made a joke that I tinted the icing with a dash of Melon Mambo re-inker so that the icing would match the paper…LOL… I did say that I was joking but no one opened the box and ate any of my cupcakes (Chelsea was happy about that because she got more)… someone said it looked too pretty…. next time I will undo the ribbon…LOL…

Oh Yes, and this time the cupcakes ARE homemade…Chelsea said they were to die for…


Contact me on michelle@ministamper.com to order any supplies used on this project or to host a workshop and I can show you how to make this project.

I can take orders from anywhere in Australia and have it shipped directly from the Stampin’ Up! Warehouse to your door. Shipping costs are $5.95 or 5% of your order, whichever is greater.

Any orders of $300 or more qualify for hostess benefits (see page 9 in the catalogue for more details).

Contact me on michelle@ministamper.com 0413 045 584 to place an order.


Stamp Sets: Homemade
Cardstock: Whisper White 12X12, Whisper White, Melon Mambo, Melon Mambo DSP, Acetate
Ink: Chocolate Chip, Pretty In Pink and Certainly Celery Markers
Punches: Scallop Circle Extra Large, 1-3/4” Circle Extra Large
Accessories: Pretty In Pink Striped Grosgrain Ribbon
Tools: Big Shot, Bigz Clear Die, Sticky Strip, Bone Folder, Scoring Blade

Tags:
January 22, 2011

My DSP Storage Solution…

by ministamper

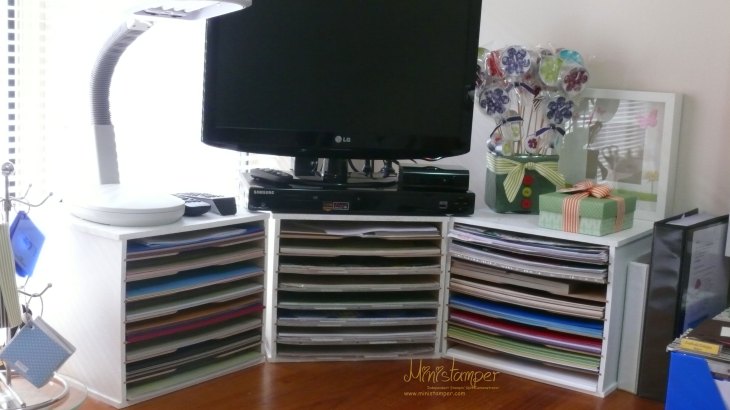
I thought i’d share how I store my Stampin’ Up! Designer Series Paper with you today, the big thing for me in my craft room is everything must be easily accessible, otherwise I never seem to use it. I’ve had these Kaisercraft storage cubes for years, they come unpainted and I just gave them a quick lick with some white acrylic paint, the paint never seems to go on evenly onto this surface  so while they were still wet I dabbed them all over with a crushed up plastic bag, this at least made my painting job look even…LOL…

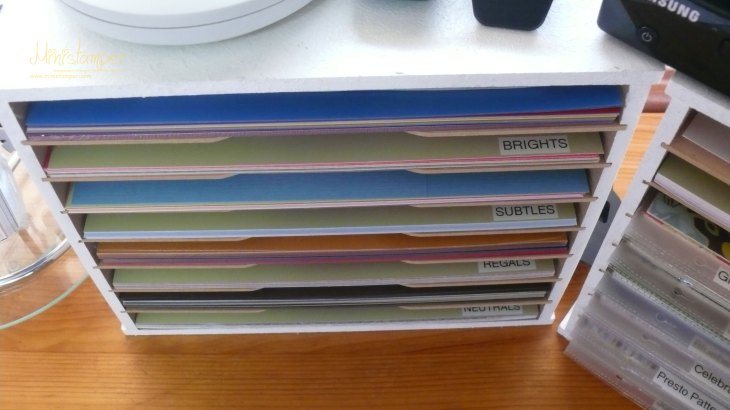
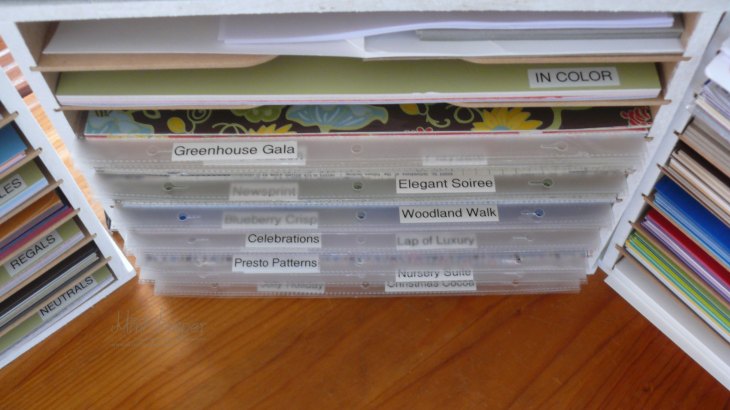
In one cube I store my 12X12 cardstock and my Designer Series Paper Patterns Stacks, I store them in their families, I have the Brights 12X12 Cardstock, on one shelf,  then the Brights DSP Patterns Stack in the shelf below, and so on.

In the next cube I store my 12X12 In-color Cardstock and Designer Series Patterns Stack and all of my Designer Series Paper Packs.

I had to put a couple of my Designer Series Paper Packs onto one shelf, like this:

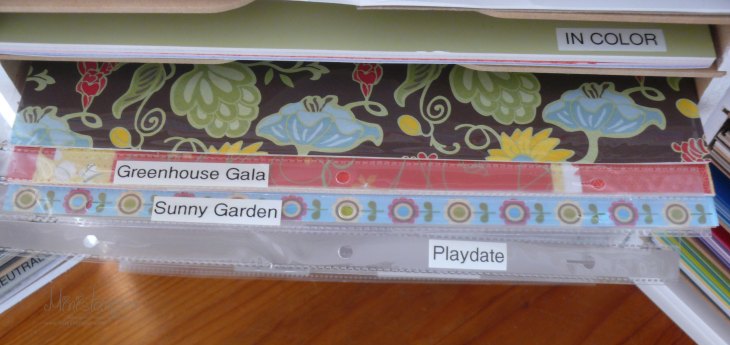
This is one pack, Greenhouse Gala, pulled out. I purchased a pack of normal 12X12 scrapbook page refills from spotlight, I carefully cut down the side of the spine so that I can slide the paper in on an angle and not just through the opening at the top, this helps me get my paper in and out easily, I labeled the spine with the DSP name, this hold the whole pack plus any little scraps, I store it with the spine jutting out from the shelf so I can easily find my paper, I love that it’s all stored nice and flat.

I hope you have enjoyed this little tutorial and that it helps you with your storage solutions.

I can take orders from anywhere in Australia and have it shipped directly from the Stampin’ Up! Warehouse to your door. Shipping costs are $5.95 or 5% of your order, whichever is greater.

Any orders of $300 or more qualify for hostess benefits (see page 9 in the catalogue for more details).

Contact me on michelle@ministamper.com 0413 045 584 to place an order.


Tags:
January 21, 2011

Valentine card…

by ministamper

This is the valentine card I made for my hubby dearest, I don’t need to worry about spoiling the surprise because he doesn’t read my blog or go onto facebook…LOL…

I love the Itty Bitty Buttons and the Pinking Hearts punch. I made this card to fit into the Stampin’ Up! small open ended envelopes… just for a change…

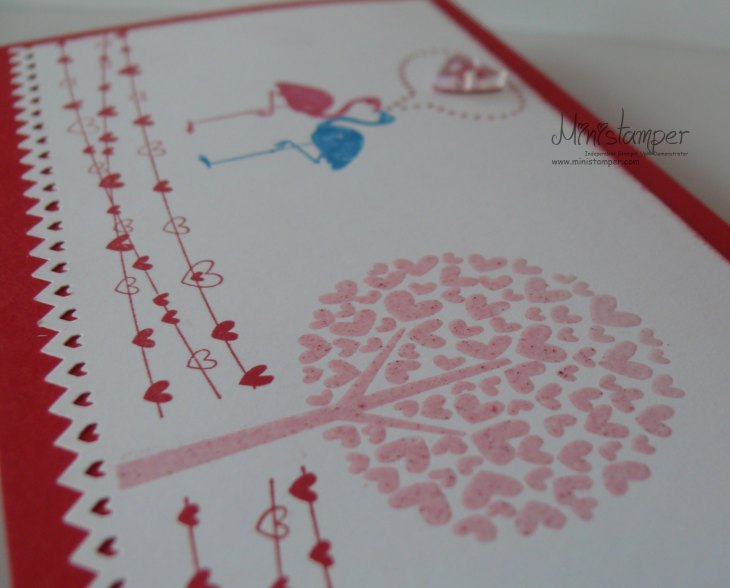
This is a close up of the loveheart tree, I used the pastel embossing technique that is on my ‘first video’, so if you want to know how to do that pop on over to videos and have a look.


Contact me on michelle@ministamper.com to order any supplies used on this project or to host a workshop and I can show you how to make this project.

I can take orders from anywhere in Australia and have it shipped directly from the Stampin’ Up! Warehouse to your door. Shipping costs are $5.95 or 5% of your order, whichever is greater.

Any orders of $300 or more qualify for hostess benefits (see page 9 in the catalogue for more details).

Contact me on michelle@ministamper.com 0413 045 584 to place an order.

I’ve gotta run now, but will update the recipe list later.

Stamp Sets:
Cardstock:
Ink:
Punches:
Accessories:
Tools: